Creating an Counseling form
This lesson instructs managers on how to create an Employee Record of Counseling form in EIS
Step 1 - Access Counseling Portal
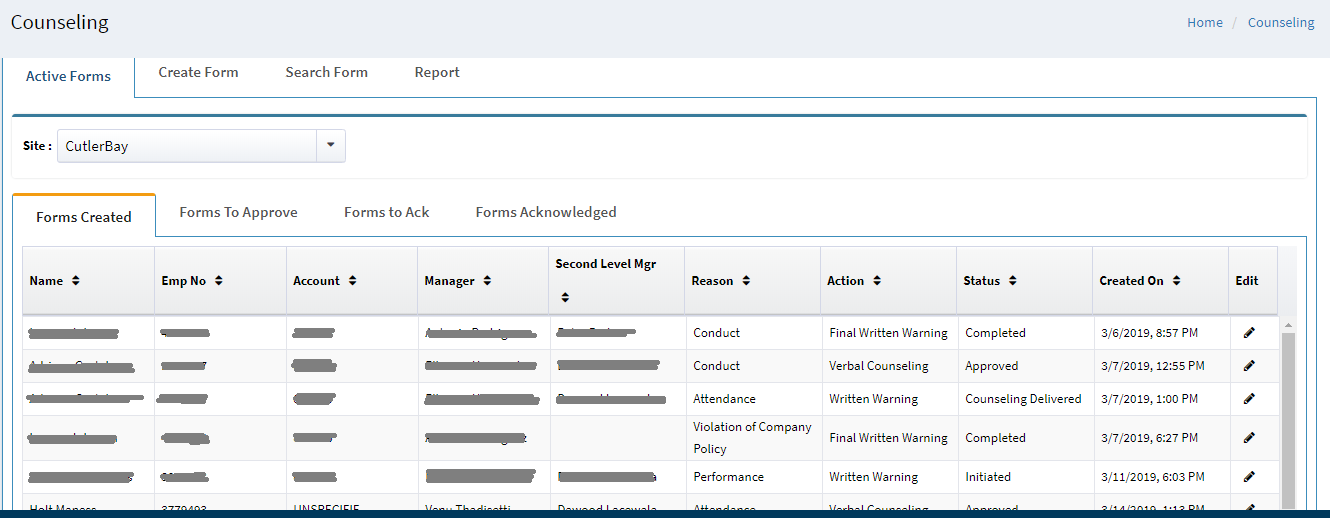
Click on Counseling
- Managers must follow established HR policies when creating a form and should not discuss the contents of the form with the employee until notified that all approvals have been completed
Step 2 - Select Employee
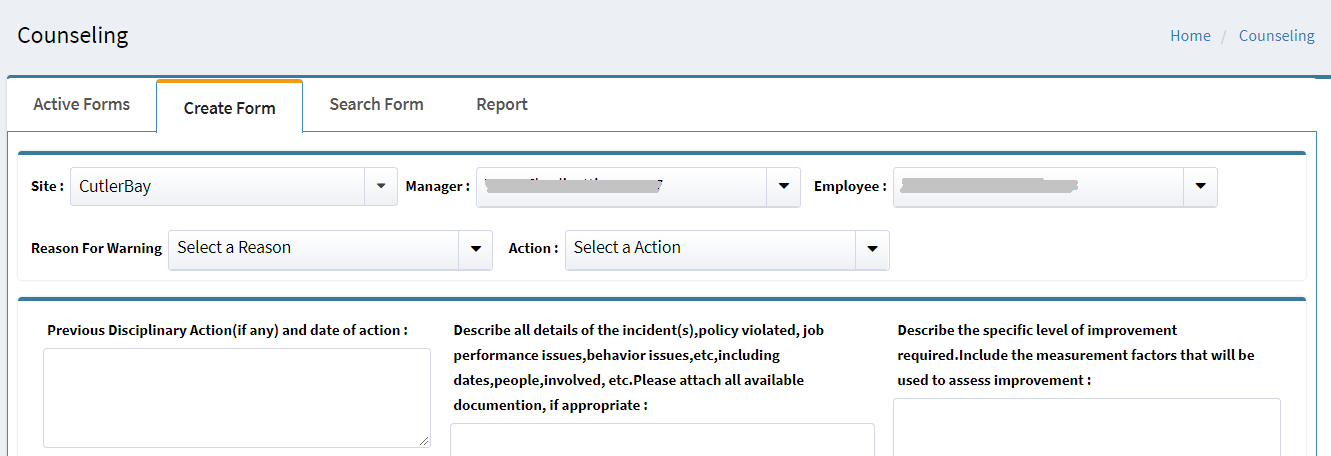
Within the Forms Created tab, select the desired employee and click the edit icon to view in detail.The selected site in Active Forms will be set as default.The same site will be displayed in Create Form with the corresponding Managers.
- The list contains all employees within the manager's hierarchy as well as all agent-level employees at the site
Step 3 - Enter Reason and Action
Click on the appropriate dropdown to select both a Reason for Warning and Action
- Only one (1) Reason for Warning and one (1) Action may be selected
- The form may not be enabled for approval until both are selected
Note: Regarding terminations, the Counseling form is used for approval only and does not begin termination of the employee in EIS or Oracle. Once a termination is approved by the 2nd-level manager and HR, the appropriate steps must be taken to begin termination proceedings in the appropriate system(s).
Step 4 - Enter Details
Enter previous disciplinary action, details of the incident(s), and level of improvement required in the three (3) available fields
- There is a 2000-character limit, so any additional details must be added in the form of an attached document
- For termination approval, enter "N/A" in the third box, "Describe the specific level of improvement required," as, at this point, improvement is no longer an option.
Step 5 - Submit Form

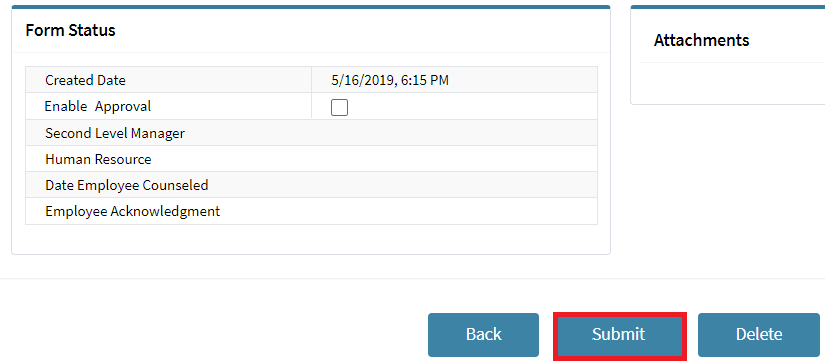
Click on the Submit button
- Submitting the Counseling Form does not begin the approval process and the form is still editable until the approval process is enabled by the manager
Step 6 - Enable Approval
When finished completing/modifying the form:
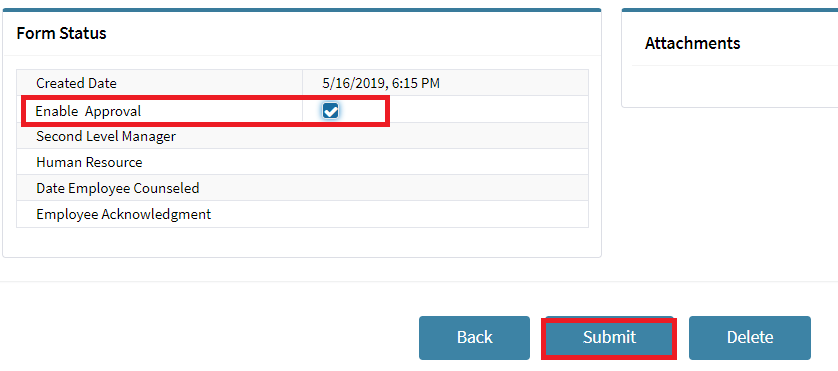
1. Click the check box next to Enable Approval
2. Click the Submit button to start the approval process
- Additional options include Attach Document and Delete Form


